
Set up at-home wellness tech so you can use devices such as a fitness tracker, smart scale, blood pressure monitor, or sleep sensor consistently and safely. This guide is for beginners who want to track personal wellness trends without treating a gadget as a diagnosis. Allow 30-60 minutes to choose a device, review its instructions, and complete setup; each later session usually takes 5-15 minutes.

Get wellness gear delivered free with Prime
- Fast, free delivery on millions of items
- Prime Video, Amazon Music and more included
- Member-only deals all year

Etekcity Smart Body Weight Scale with Body Fat and BMI Tracking
- ✔ Weight capacity: 400 lb / 180 kg / 28 st
- ✔ Measurement increments: 0.05 lb at lower weights; 0.1 lb above 10 kg
- ✔ Tracked biometrics: 13 through the VeSync app

REVO Original 4-in-1 Smart Cupping Massager
- ✔ Functions: Suction cupping, vibration massage, LED light, adjustable heat
- ✔ Intensity levels: 12
- ✔ Power: Rechargeable

Zacurate Pro Series 500DL Fingertip Pulse Oximeter with Silicone Cover, Batteries, and Lanyard
- ✔ Measurements: SpO2, pulse rate, and pulse strength
- ✔ Display: User-facing LED
- ✔ Reading time: About 10 seconds
Difficulty: Beginner | Time: 30-60 minutes for setup; 5-15 minutes per use
What You’ll Need
Tools & Materials:
- A wellness device suited to the measurement or habit you want to track
- A compatible smartphone or tablet if the device requires an app
- The device’s charging cable, batteries, or power adapter
- A stable, clean surface or suitable place to wear or position the device
- A notebook or notes app for recording readings if the device does not save them
Knowledge:
- Basic ability to use a smartphone and connect to Wi-Fi or Bluetooth
- Understanding that wellness gadgets can inform personal tracking but do not replace medical advice
Set aside a quiet place and read the device’s safety and setup instructions before use. Check that the gadget fits your goal, works with your phone, and is suitable for your body or home. For medical measurements such as blood pressure or blood glucose, follow a clinician’s guidance on device choice and use. Do not change medication or delay care based on a consumer gadget reading.
Etekcity Smart Body Weight Scale with Body Fat and BMI Tracking
For a buyer building a repeatable at-home tracking routine, the Etekcity Smart Body Weight Scale covers the most ground in this lineup. It records weight and tracks 13 biometrics through the VeSync app, with progress graphs and connections to services such as Apple Health, Samsung Health, Google Fit, Fitbit, and MyFitnessPal. Compared with the REVO massager, it is less about a single self-care session and more about seeing measurements over time; compared with the Zacurate oximeter, it captures a wider set of ongoing body metrics.Its household features add practical flexibility: it supports multiple users and includes modes for zero-current weighing, babies or pets, and light items as small as 100 g. The 400 lb capacity and selectable lb, kg, or st units make it adaptable for different users. Still, the scale’s broader tracking depends on using a compatible phone and app, and some functions may not work with older operating systems. Its biometric estimates are not a substitute for professional assessment, and the listing says it is not intended for professional athletes. We see it as the strongest all-rounder for a household that values consistent, connected tracking, rather than a specialist performance tool.
Pros:
- Tracks 13 biometrics with progress graphs in the VeSync app
- Supports multiple users and integrations with popular health platforms
- Offers weighing modes for babies, pets, and light items
- Measures up to 400 lb and supports lb, kg, and st
Cons:
- Some app functions may require newer iOS or Android versions
- Not intended for professional athletes or clinical assessment
Best for: Households that want shared weight and biometric tracking, progress graphs, and connections to their existing health apps.
Not ideal for: Professional athletes seeking a specialized body-composition tool, or buyers who do not want app-based tracking or have an unsupported older phone.
Bottom line: We recommend the Etekcity scale for the broadest at-home tracking routine in this comparison, provided its app fits your phone and expectations.
“We recommend the Etekcity scale for the broadest at-home tracking routine in this comparison, provided its app fits your phone and expectations.”
REVO Original 4-in-1 Smart Cupping Massager
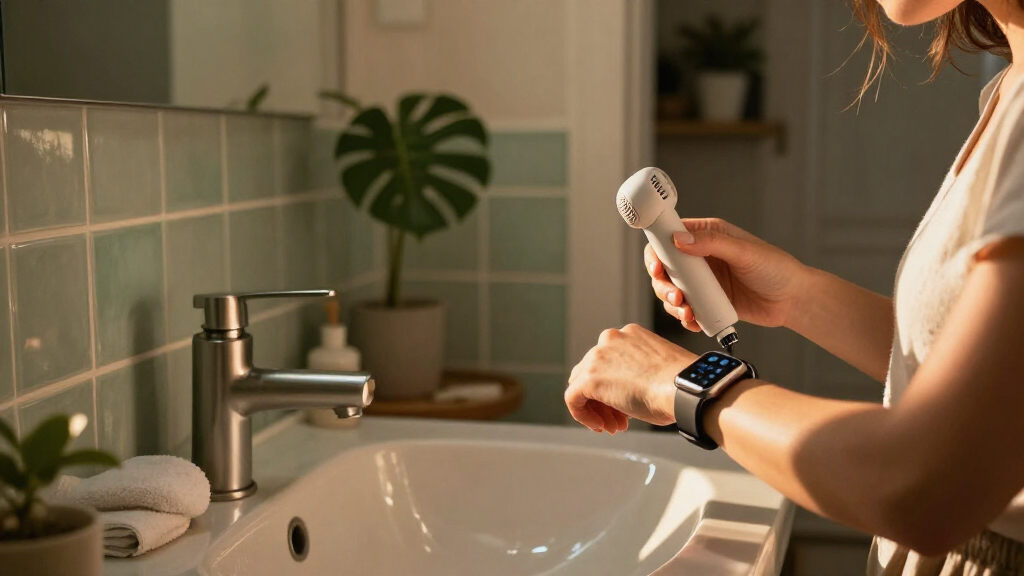
The REVO Original 4-in-1 Smart Cupping Massager is the most hands-on pick here. It combines adjustable suction and vibration with heat and LED light, letting users choose different mode combinations and among 12 intensity levels. That range gives it a more customizable self-care role than the scale or oximeter, which are built around measurements rather than a session you actively control.Its cordless, rechargeable design makes it easier to move around the home than a device tied to a fixed spot, and the flameless format avoids the open flame associated with traditional cupping approaches. The tradeoff is that it is a dedicated massager: it cannot provide the household tracking of the Etekcity scale or the spot readings of the Zacurate. The supplied details also do not state battery life or charging time, so we cannot judge how often it will need charging. Buyers should be comfortable with cupping as part of their personal routine and should follow the product instructions. For someone who wants adjustable physical self-care in one portable unit, it stands apart; for people seeking measured health data, it is the wrong tool.
Pros:
- Combines suction cupping, vibration, LED light, and adjustable heat
- Provides 12 intensity levels and selectable mode combinations
- Cordless and rechargeable for portable use around the home
- Flameless format
Cons:
- Only one device is included
- Battery life and charging time are not provided
Best for: People looking for a portable, rechargeable cupping device with adjustable suction, vibration, heat, and LED functions.
Not ideal for: Buyers whose main goal is health tracking, pulse or oxygen readings, or a device with clearly specified battery runtime.
Bottom line: We’d choose the REVO when adjustable cupping and massage are the goal, not when the priority is tracking wellness metrics.
“We’d choose the REVO when adjustable cupping and massage are the goal, not when the priority is tracking wellness metrics.”
Zacurate Pro Series 500DL Fingertip Pulse Oximeter with Silicone Cover, Batteries, and Lanyard
When the wellness question is specifically about a quick pulse and blood oxygen spot check, the Zacurate Pro Series 500DL is the most focused and portable option in this group. It displays SpO2, pulse rate, and pulse strength on a user-facing LED screen, with readings in about 10 seconds. Batteries, a silicone cover, and a lanyard are included, so it can be carried or stored as a small standalone gadget rather than relying on the phone app used by the Etekcity scale.That simplicity comes with a narrower role. Unlike the scale, it does not build a broader picture of household metrics; unlike the REVO, it does not support a hands-on recovery routine. It is intended for sports and aviation use and is not a medical device, so buyers should not use it to diagnose a condition or replace clinical advice. Movement, low blood perfusion, nail polish, or artificial nails can affect readings, which matters when interpreting an unexpected result. We see it as a compact choice for occasional nonclinical checks, not a comprehensive wellness monitor.
Pros:
- Displays SpO2, pulse rate, and pulse strength
- User-facing LED screen and approximately 10-second reading time
- Includes batteries, lanyard, and protective silicone cover
- Compact and lightweight at 3.2 ounces
Cons:
- Not a medical device and not intended for diagnosis
- Movement, low perfusion, nail polish, or artificial nails may affect readings
Best for: People seeking a small, battery-powered device for occasional SpO2 and pulse spot checks in sports or aviation contexts.
Not ideal for: Anyone needing a medical-grade monitor, diagnosis, continuous tracking, or a device unaffected by movement or nail conditions.
Bottom line: We’d pick the Zacurate for portable, occasional spot checks when its nonmedical limits are understood.
“We’d pick the Zacurate for portable, occasional spot checks when its nonmedical limits are understood.”
As an Amazon Associate we earn from qualifying purchases.
Before You Start
Decide what you want to track and choose one device that measures it. A tracker may help you notice activity patterns; a validated upper-arm monitor may support blood pressure tracking; a smart scale may record weight trends. Check the manufacturer’s instructions for age, health, placement, cleaning, and environmental limits. Review app permissions and privacy settings before entering personal information. If a reading will inform medical care, ask a healthcare professional which device and measurement routine to use.
Step-by-Step Instructions
Step 1: Choose a device for one clear goal
Write down the question you want the gadget to help answer, such as how often you walk, whether your sleep schedule is regular, or what your blood pressure readings are over time. Compare devices that measure that specific thing. Check compatibility, recurring fees, replacement supplies, warranty, and whether the maker explains how to use and interpret readings. For health measurements, look for a device validated for that purpose and ask a clinician if you are unsure.
Tip: Avoid buying several gadgets at once. A single device is easier to set up and use consistently.
Check: You can name the measurement or habit the device tracks and confirm it suits your phone, budget, and intended use.
Step 2: Prepare the device and its location
Unpack the device and check its components against the manual. Charge it or install the specified batteries, then place it where you will use it. Choose a dry, stable spot away from extreme heat, moisture, direct sunlight, or household activity that could interfere with readings. For a scale, use a hard, level floor; for a blood pressure monitor, choose a quiet seat and keep the cuff within reach.
Tip: Keep small parts, charging cables, and batteries away from children and pets. Follow the manual’s cleaning and storage guidance.
Check: The device powers on, has enough charge, and is positioned as the manufacturer describes.
Step 3: Install the app and check privacy settings
If the device uses an app, download the official app from your phone’s app store. Confirm the app publisher matches the manufacturer, then review the permissions it requests. Allow only the access needed for the features you plan to use, such as Bluetooth for syncing. Read the account and data-sharing choices, set a strong password if an account is required, and skip optional profile details that are not needed.
Tip: Some devices work without an account or cloud syncing. Check the manual before granting access to contacts, location, or other unrelated data.
Check: The official app opens, its permissions match the features you need, and you understand where readings may be stored or shared.
Step 4: Pair and configure the device
Turn on Bluetooth or Wi-Fi if the manual calls for it. Open the app’s device setup screen and follow its pairing instructions, keeping the phone near the gadget. Enter only the profile information needed for accurate use, and select the correct units, time zone, and measurement preferences. If a firmware update is offered, keep the device charged and follow the manufacturer’s update instructions before taking readings.
Tip: Pair through the app or the device’s stated setup method. Repeatedly pairing through the phone’s general Bluetooth menu can create duplicate or incomplete connections.
Check: The app shows the correct device as connected, and its displayed units and settings match your preferences.
Step 5: Learn the correct measurement technique
Read the section of the manual for your first measurement and copy its instructions exactly. Wear a tracker snugly as specified, stand still on a scale, or fit a monitor cuff at the stated position and size. For blood pressure, sit quietly with your back supported and feet flat if the instructions say to do so. Avoid measuring immediately after exercise, caffeine, a meal, or another event when the manual or clinician advises waiting.
Tip: Incorrect placement and timing can change readings. Do not compare numbers taken under very different conditions as if they were directly comparable.
Check: You can explain where the device goes, what position to use, and any timing rules before starting.
Step 6: Take a first reading and record the conditions
Use the device once according to its instructions. Wait for the completion cue, such as a displayed result, vibration, or saved session. Check that the reading includes the expected units and date or time. Record the result along with useful context, such as time of day, activity, or whether you had just eaten, when that information is relevant. If a result appears unusual, repeat only as the device instructions or your clinician advise.
Tip: A single reading may be affected by fit, movement, or timing. Look for patterns across comparable sessions rather than reacting to one number.
Check: The device completes a measurement, displays or saves a result, and you can find that result again.
Step 7: Set a simple routine and review trends
Choose a realistic schedule based on the device instructions and your goal. For example, weigh under similar conditions when you choose to track weight, or measure blood pressure at the times recommended by your clinician. Use reminders only if they help you follow the routine. Review weekly or monthly patterns in the app or your notes, and check for gaps or readings taken under different conditions before drawing conclusions.
Tip: Turn off notifications that do not support your routine. Frequent alerts can make a helpful tool harder to use.
Check: You have a repeatable schedule and can view multiple readings or sessions together for comparison.
Step 8: Clean, charge, and store the gadget
After use, clean the device only with the materials and method described by its manufacturer. Dry it fully when instructed, recharge it before the battery runs low, and store it in a safe place. Keep cuffs, sensors, and straps in good condition; replace batteries or consumable parts on the schedule given in the manual. Check periodically for app or device updates and review privacy settings if the app changes.
Tip: Do not immerse a device or use household cleaners unless the manual specifically allows it.
Check: The device is clean, undamaged, charged or ready to charge, and stored as directed.
Common Mistakes to Avoid
- Choosing a gadget because it has many features rather than because it measures a specific goal. — Name the measurement or habit you want to track first, then compare only devices that support it.
- Taking readings with inconsistent placement, posture, or timing. — Follow the manual each time and keep conditions as similar as practical when comparing results.
- Treating a consumer reading as a diagnosis or changing treatment based on it. — Use readings as personal tracking information. Discuss concerning or persistent results with a healthcare professional.
- Granting broad app permissions or sharing health data without checking the settings. — Review permissions and sharing options during setup, and enable only the features you intend to use.
Troubleshooting
Problem: The app cannot find or pair with the device.
Solution: Charge and turn on the device, keep it close to the phone, and confirm Bluetooth or Wi-Fi is enabled as required. Close and reopen the official app, then follow its pairing steps. If needed, consult the manual before resetting the device, since a reset may erase saved data.
Problem: The gadget gives inconsistent or implausible readings.
Solution: Check fit, placement, posture, battery level, and the surface or environment. Repeat the measurement under the manual’s recommended conditions. For medical readings, use the clinician’s instructions and contact them about repeated unexpected results.
Problem: Readings appear on the device but do not show in the app.
Solution: Open the app with the device nearby, check its connection status, and allow time for syncing. Confirm the phone has internet access if cloud syncing is required. Check the app’s help instructions before deleting data or reinstalling.
Problem: The app requests information or permissions you do not want to provide.
Solution: Decline optional permissions and review whether the device supports local or limited use. If a required permission seems unrelated to the feature, check the manufacturer’s privacy policy or support guidance before continuing.
What Success Looks Like
Your gadget is set up, paired if needed, and configured with the correct units and privacy choices. You can follow the recommended measurement technique, complete a session, find its saved result, and repeat the process on a practical schedule. Readings are taken under reasonably consistent conditions, and you understand that trends can support personal tracking but do not diagnose a condition or replace professional care.
Next Steps
Use the device on the schedule you selected and review trends at a steady interval. Keep its manual and charging or replacement supplies together, and revisit app permissions if you add features or connect another service. Stop using a device that is damaged or causes discomfort. Contact the manufacturer for setup or hardware problems; discuss health concerns and medical readings with a qualified healthcare professional.
Frequently Asked Questions
Which wellness gadget should I set up first?
Start with the device that directly supports one clear goal. If you want medical measurements, ask a healthcare professional which type and model is appropriate before buying or relying on readings.
How often should I take readings?
Follow the device instructions and, for medical measurements, your clinician’s schedule. A consistent routine makes readings easier to compare; taking more readings than advised may not add useful information.
Can I use a wellness gadget instead of seeing a clinician?
No. Consumer gadgets can help you record patterns, but they cannot replace diagnosis or treatment. Seek professional advice about persistent symptoms or concerning results.
Should I share my readings with an app or cloud service?
Choose based on the features you need and your comfort with the service’s data practices. Review permissions, account settings, and sharing controls first; use local storage or manual notes if available and preferred.
What should I do if a medical reading seems alarming?
Follow the device instructions and any care plan from your clinician. Repeat only if those instructions recommend it, and contact a healthcare professional for guidance. Seek urgent care for severe symptoms rather than relying on the gadget to decide what is happening.